Mountainbikes in the 1990s weren’t as optimized for off-road riding as they are today. They still shared a lot of DNA with road bikes, specifically when it comes to frame geometry. They had steep head angles, slack seat angles and long, horizontal toptubes. Today that special blend of geometry is sought after for commuter and gravel bike conversions because of its versatility. One effect of that geometry however is a relatively streched out riding position.
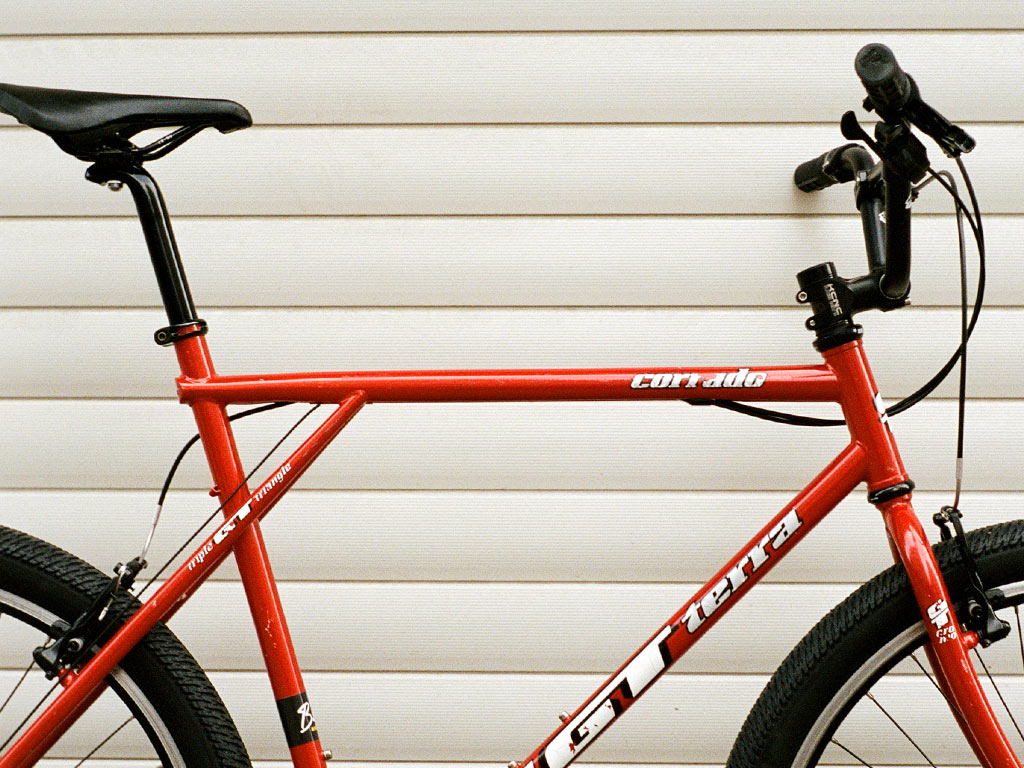
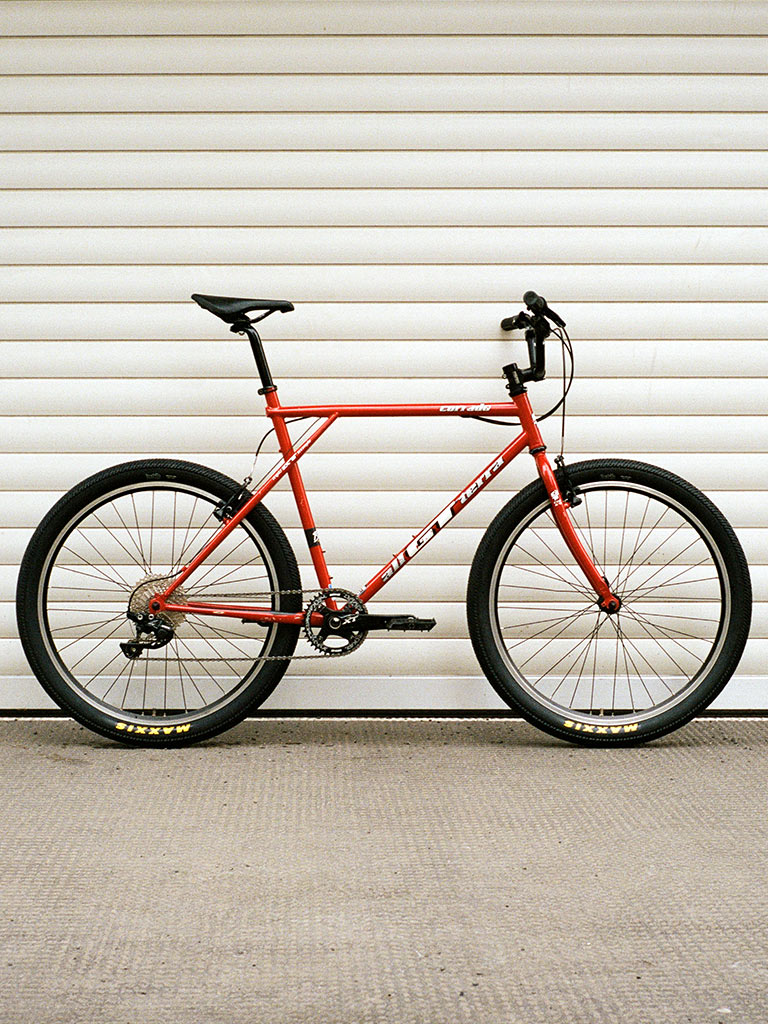
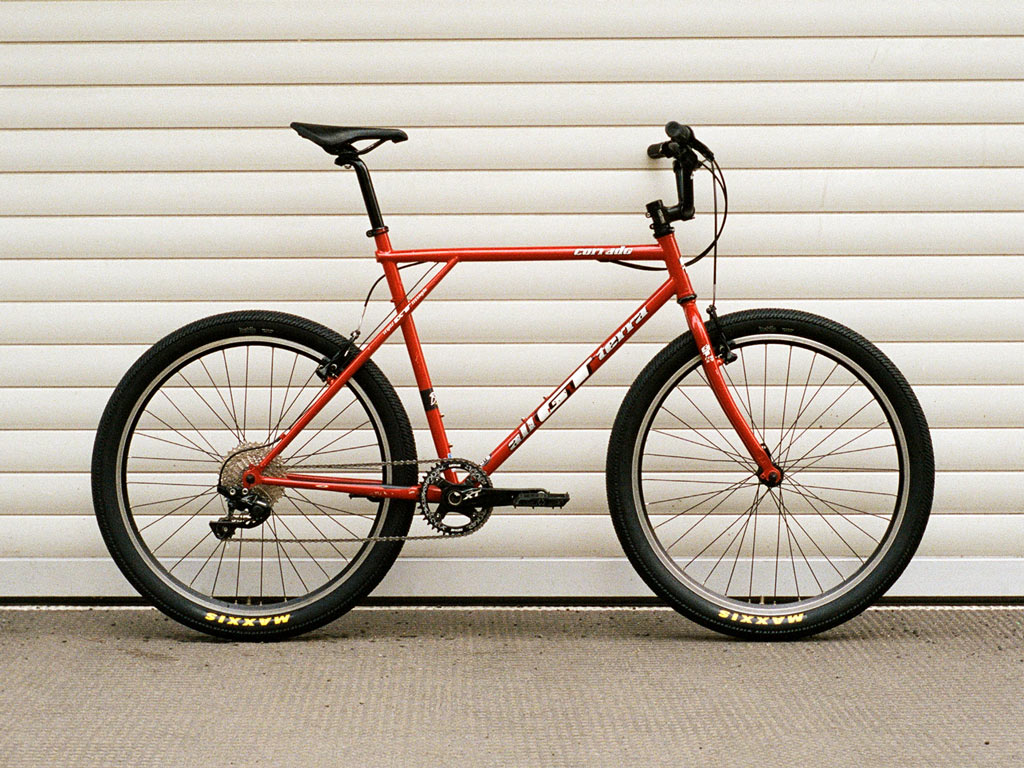
Michel is 191cm tall and fell in love with a red ’94 GT Corrado. On paper the 22.5″ frame should have been a good fit, but GT’s sizing is a bit decepetive here, as the seattube extends higher from the toptube than the headtube. This Corrado has a 57cm seattube with a relatively short 14cm headtube. You’d usually expect the front to be a centimeter or two higher.
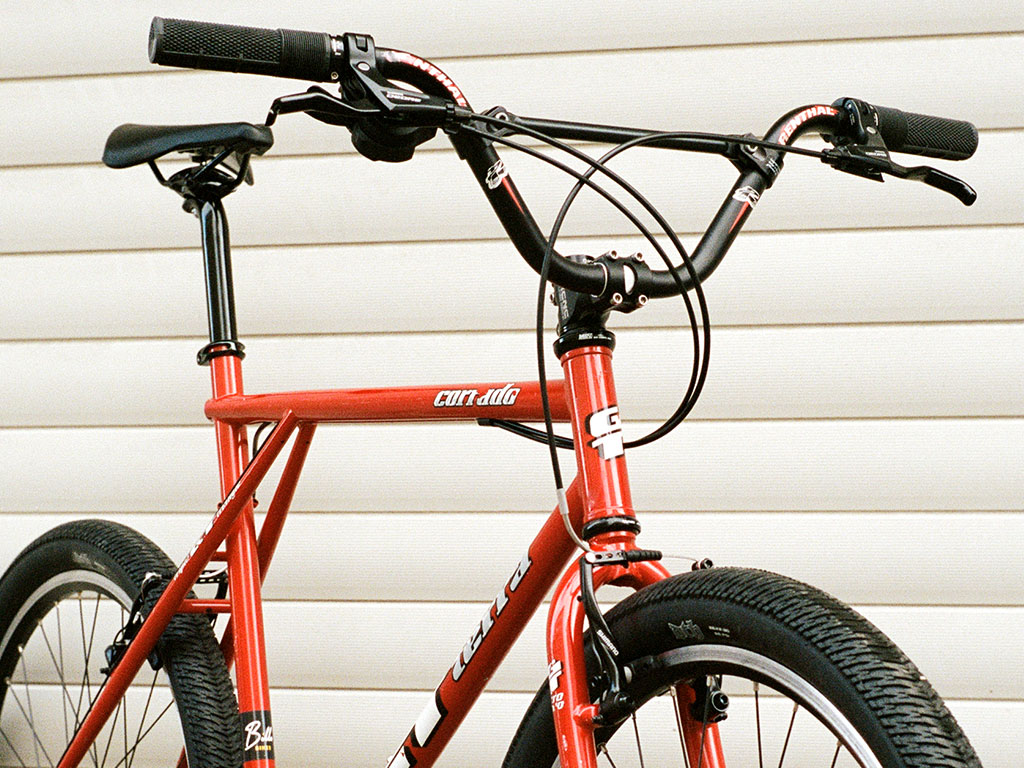
BMX bars on a Mountainbike?
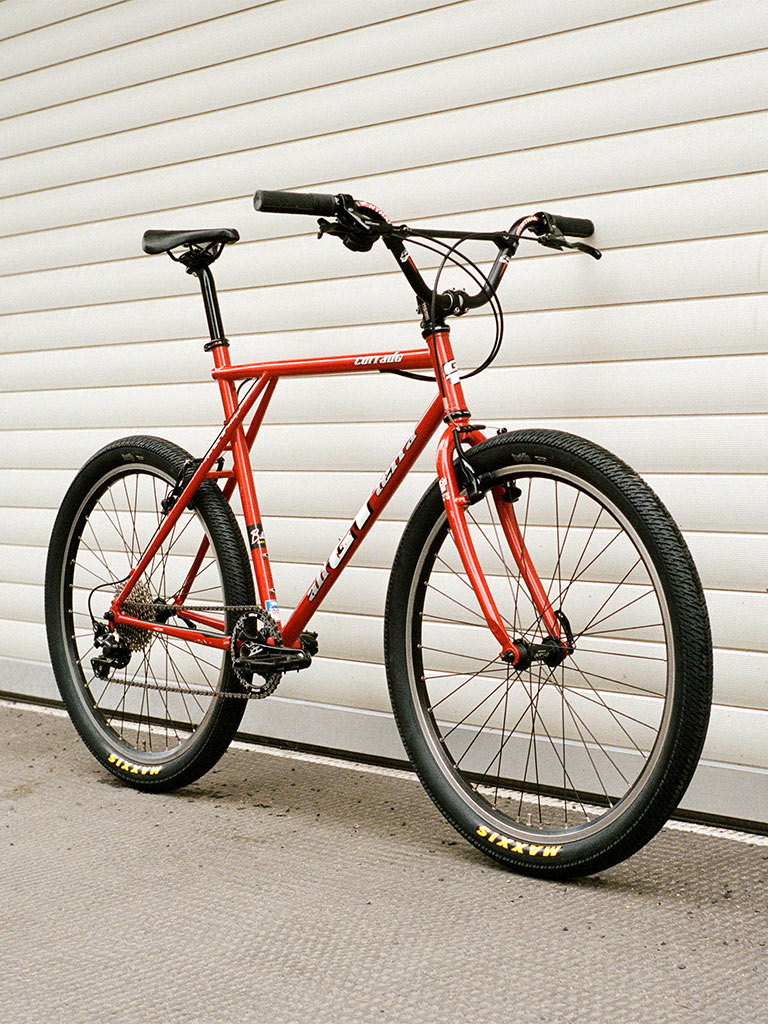
Tall BMX riser bars can help raise the front of any bike for a more comfortable fit. In an ideal world, Michel would have sized up, but while larger GT frames do exist, they are incredibly rare. I’m about as tall as Michel myself however, and I ride a 1991 GT Avalanche in the same size as this Corrado. I knew from experience adapting the fit to a more comfortable position was possible.

The goal was to get the grips to roughly the same height as the saddle. Bike fit is always a balancing act. When the bars are too low, there’s too much weight on the wrists. If they’re too high, the weight shifts to the seatbones. It’s important to consider how the bike will be used as well. An aggressive drop is great for climbs and races, but an upright position is more comfortable, let’s you see more of your environment and makes it easier to lift the front wheel.
Bike fit is a complex topic but at least for these sort of projects having the bars level with the saddle is usually a good starting point. The final fit can always be fine-tuned later with stem spacers and bar rotation.
Raising the Bar
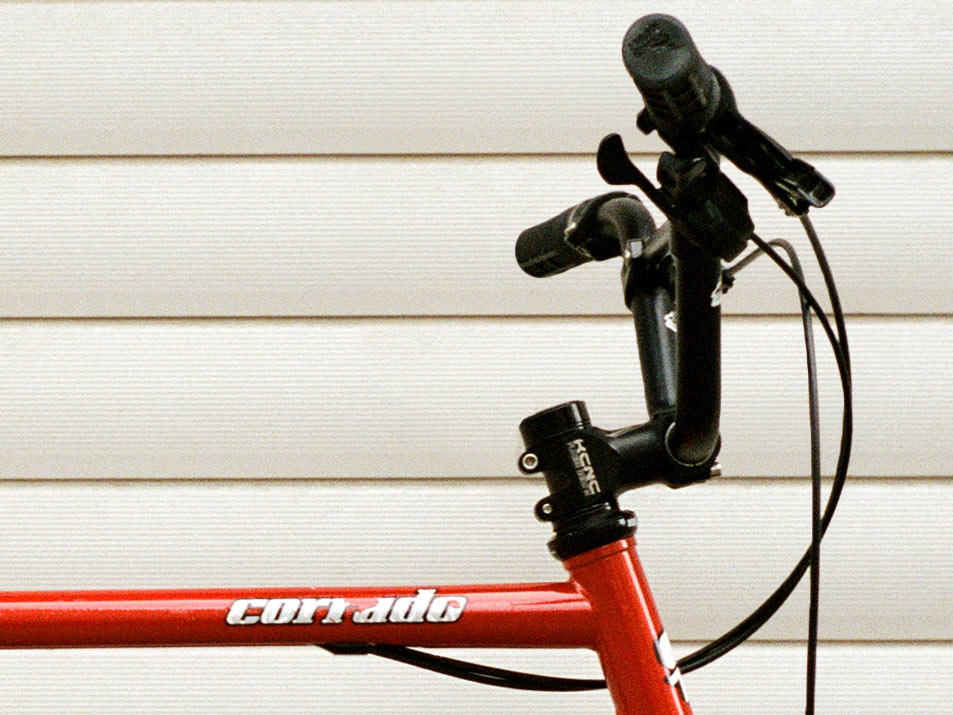
There are different ways to increase the height of the bars. Stem spacers are one option, but unless the fork has an uncut steerer, it tends to be hard to gain any meaningful height with them. A riser stem could be another solution, but short, steep and tall ones are hard to find, and making those look cool can be a challenge in itself.
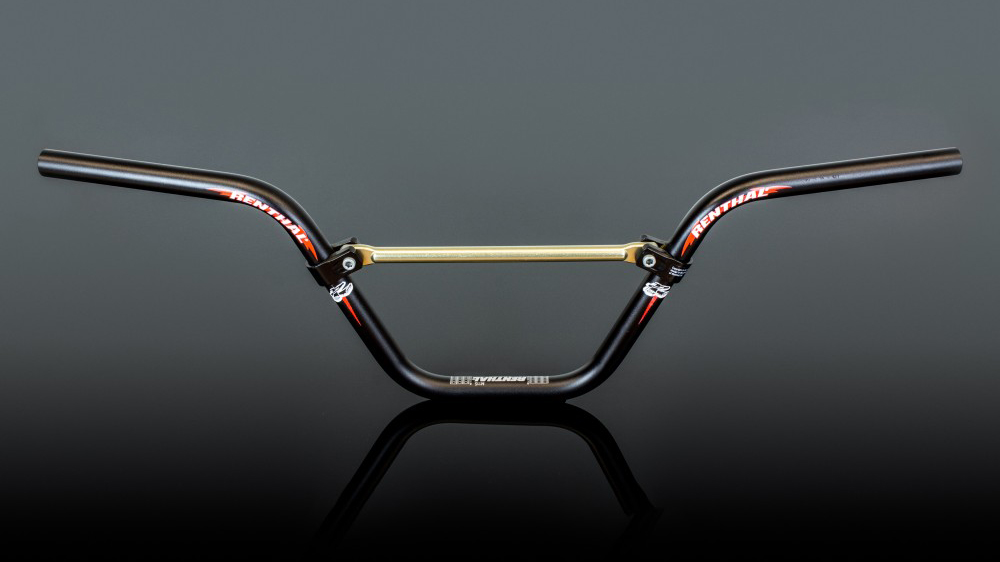
70mm riser bars usually work well for a lot of builds but we needed twice that amount of rise here. Most BMX bars are around 200mm tall however, which would have been way too much. Renthal Moto bars come in four sizes, and the 140mm version was a perfect fit for this project. They’re also made of alloy and a lot lighter than most steel alternatives at just around 600 grams.
Bar Rotation VS. Reach
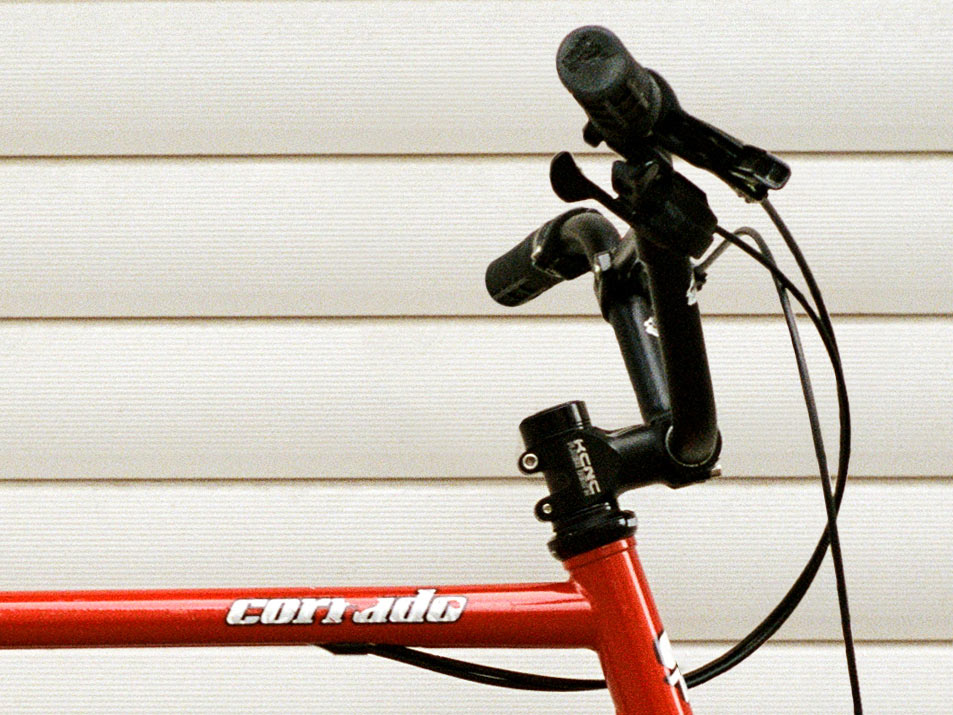
The 50mm stem used for this build might sound reasonably short on paper. However, because of the vertical handlebars the bike handles as if it had a 70 or 80mm stem. That’s because rotating the handlebars forwards effectively lenghtens the stem. While that is true for all riser bars, this effect becomes a lot more pronounced with tall BMX bars.
See my attempt to illustrate this phenomenon below. Spot the difference? A few degrees of bar rotation can have a big effect.
Frame & Build Highlights
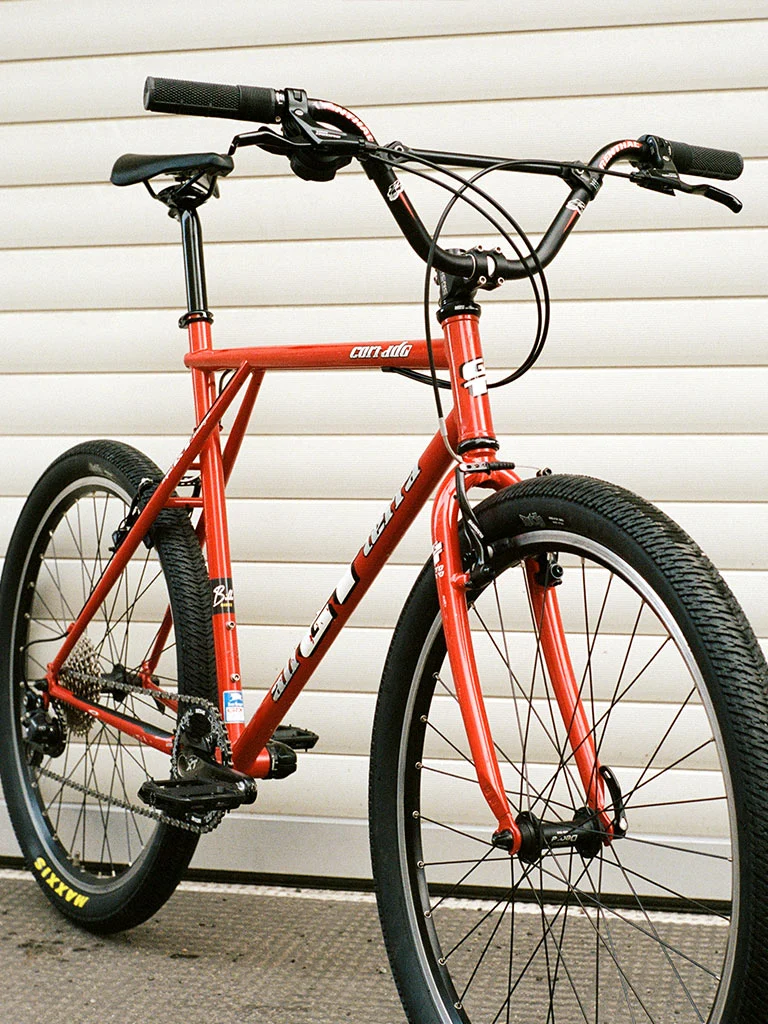
Originally I was tempted to keep this frame for myself–not just because it’s red. GT had fallen in love with u-brakes for a while, only to return back to cantilevers in 1993. The evolution of mountainbike technology is a history of errors. As u-brakes and cantilever brakes use different mounts, I’m locked into using a u-brake on my 1991 Avalanche. With cantilever mounts on this 1994 Corrado we were able use stronger v-brakes front and rear.
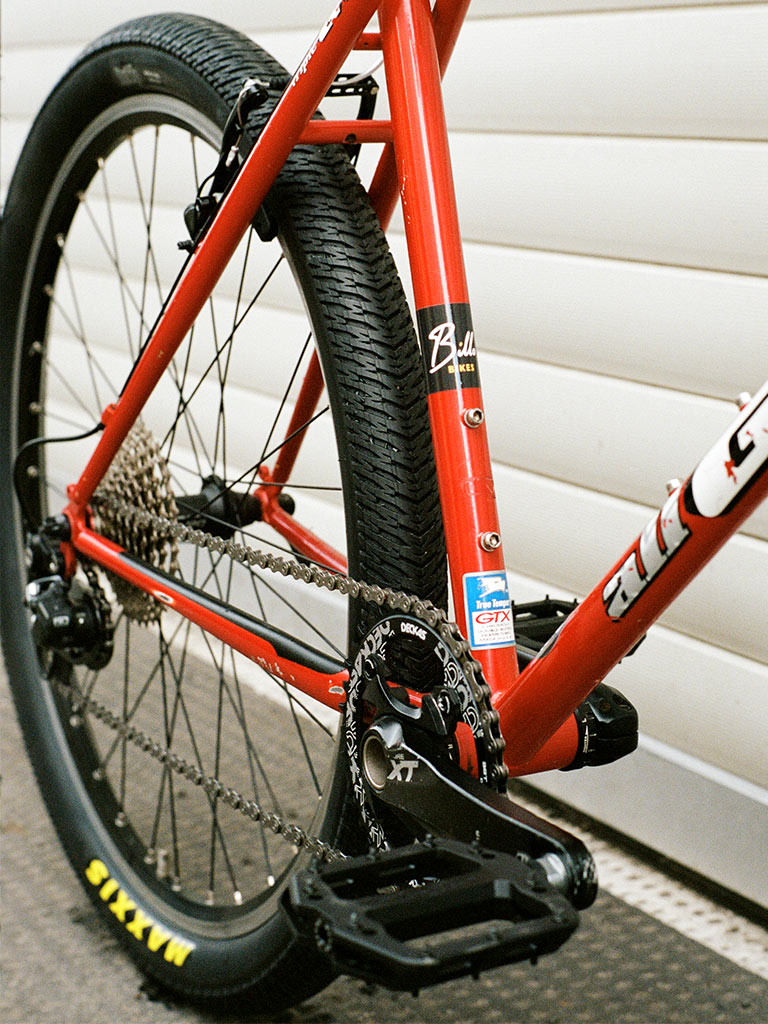
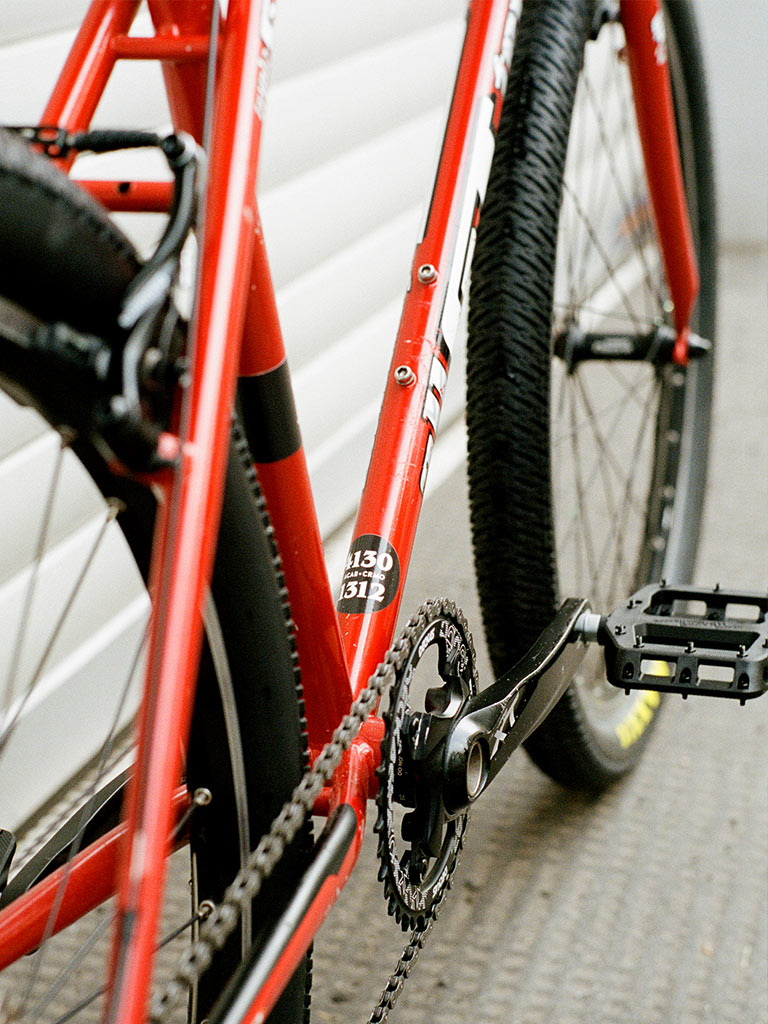
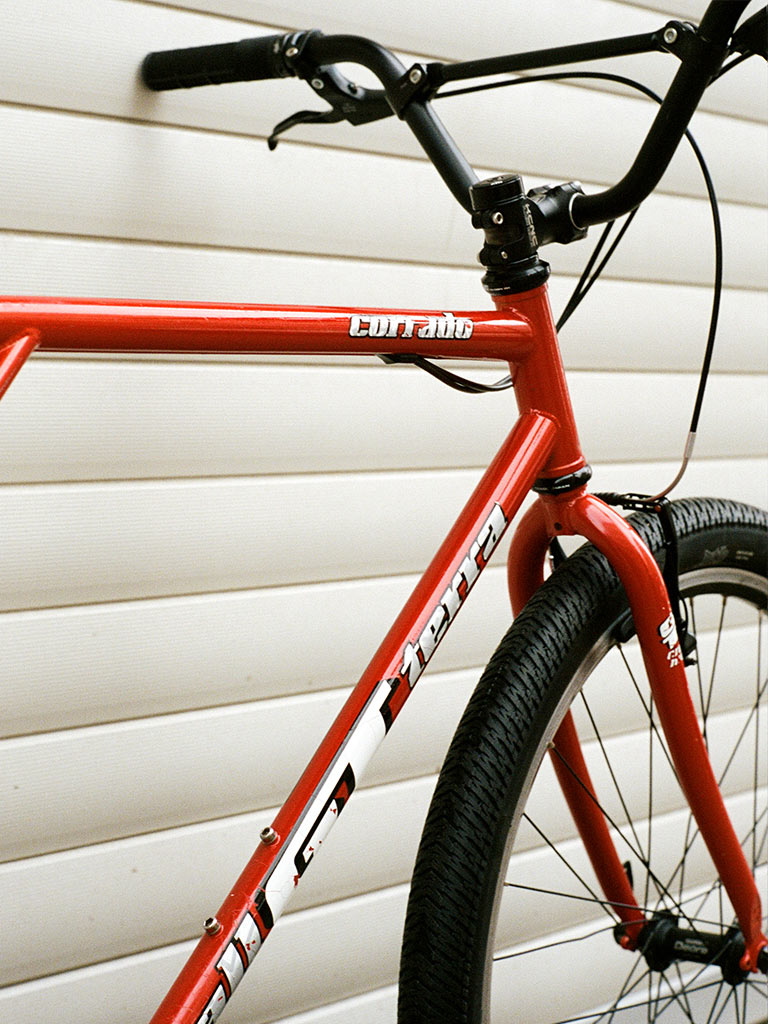
The double-butted True Temper GTX tubing used for this frame comes with some interesting custom details. Most visible is the classic triple triangle with its dropped seat stays. The toptube is ovalized on both ends and the rear brake and shifter cable are routed semi-internally in the the ‘Groove Tube’, a small channel running on the underside of the downtube. You can tell a lot of extra steps were taken during the design and manufacturing process.
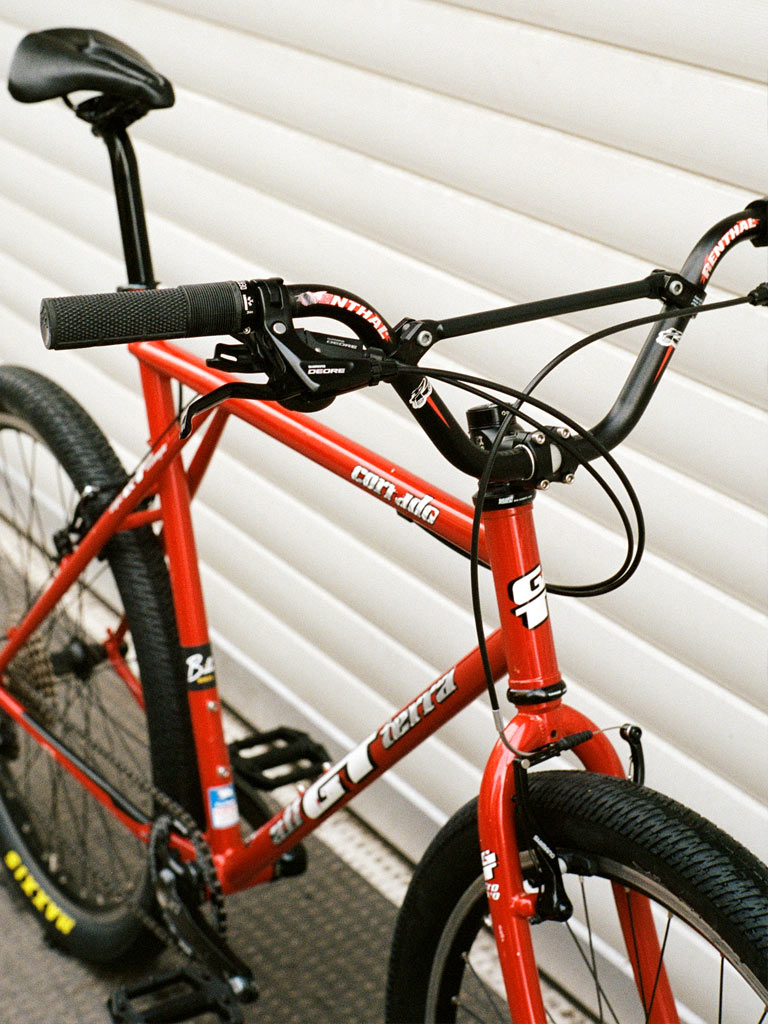
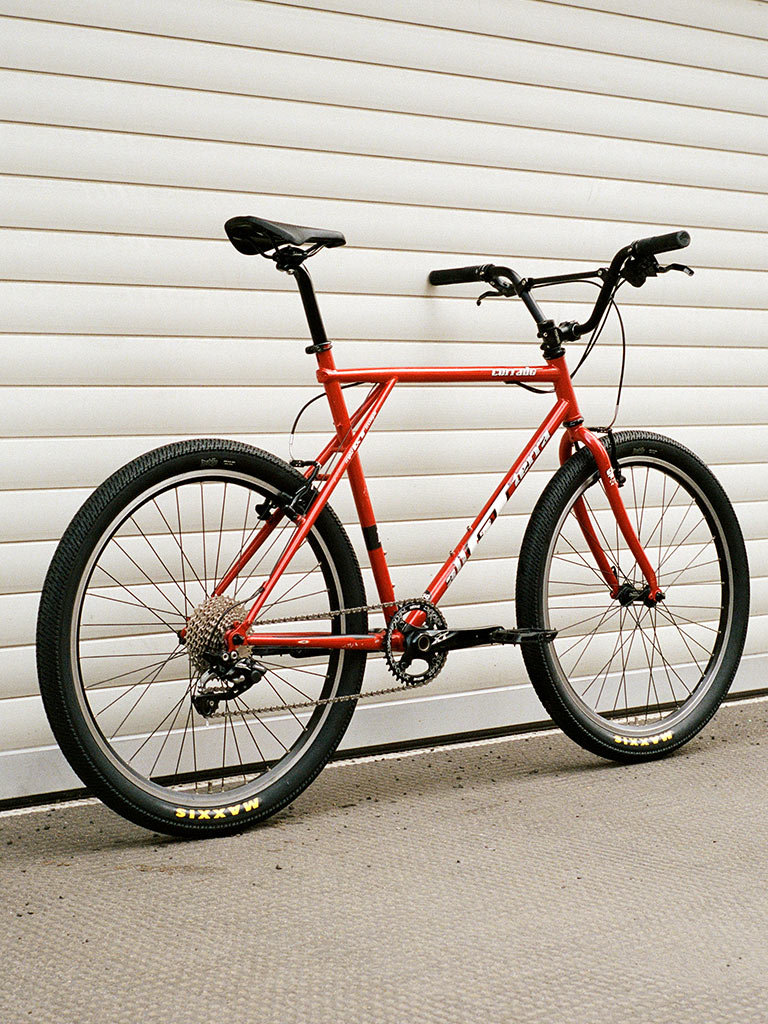
All black components were a priority. As the frame was in mint condition, I didn’t want to distract from it with shiny parts. The golden crossbar on the Renthal bars was also powder coated black to match the rest of the build.
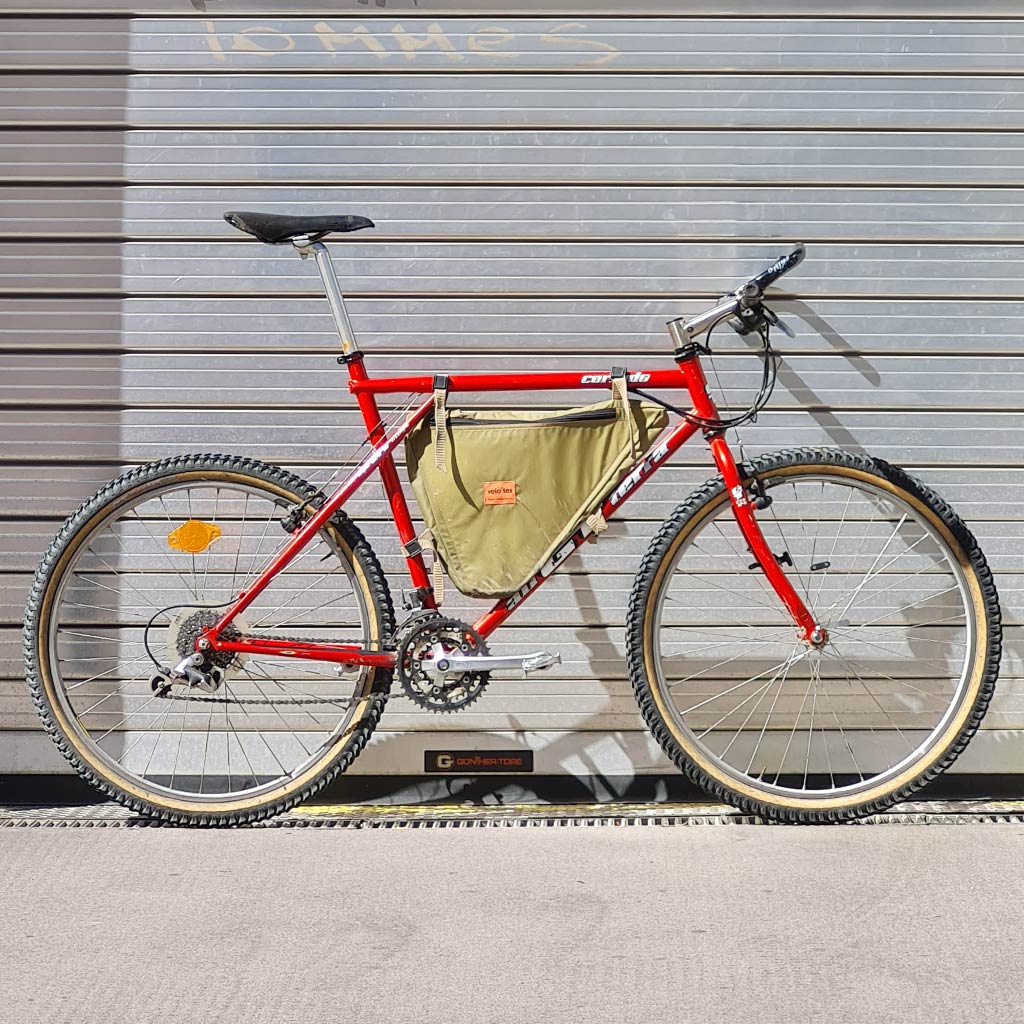
The drivetrain is a mix of 1×10 XT and Deore. I’ve found 11-36 cassettes to be the sweet spot for our local area. A 38-tooth chainring up front let’s you keep up on the cycling paths along the Danube river and can still be easily spun up the hills surrounding Vienna.
This Corrado is a build close to my heart and I’m happy to know it’s in good hands. The Renthal Moto bars actually used to be on my own bike. I gave them to Michel for this rebuild, after changing to slightly lower S&M bars on the Avalanche. I had just switched to a longer Surly Troll fork at the time, and didn’t need as much rise anymore.
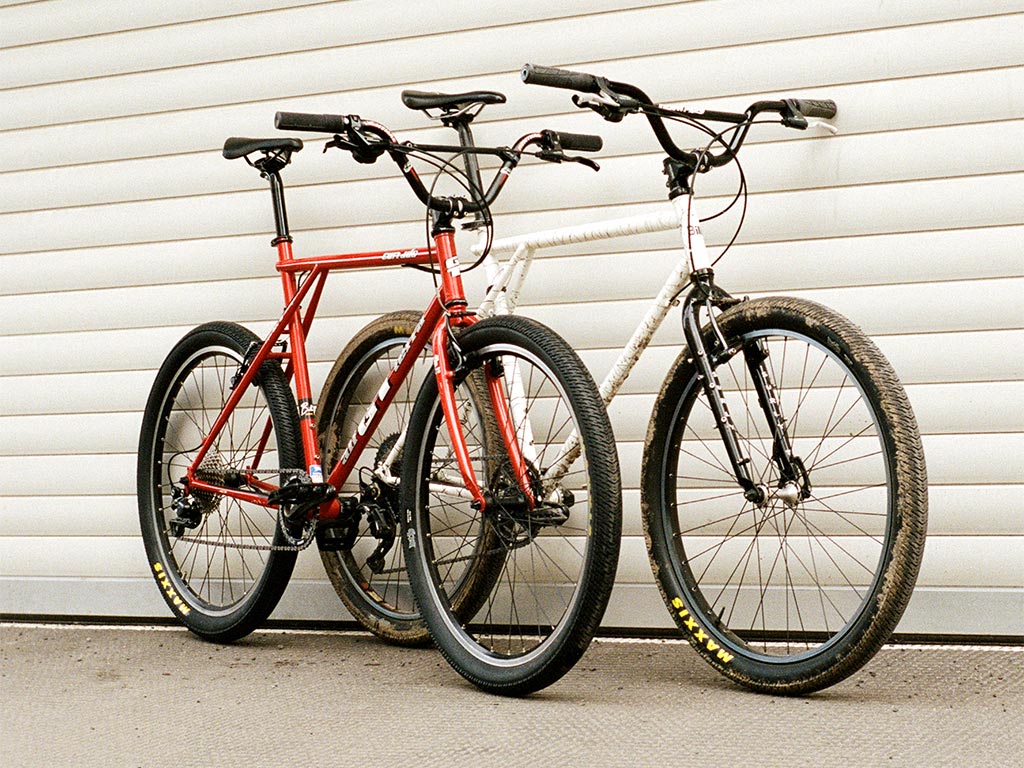
Rider & Bike
Michel with their BMX GT MTB.
Parts List
Frame: GT Corrado (1994)
Rims: Rigida Zac2000
Hubs: Shimano Deore
Tires: Maxxis dth 2.3
Stem: KCNC Flyride (50mm)
Bars: Renthal Moto BMX (5.5 rise)
Grips: DMR Deathgrips
Brakes: Shimano T-4000
Levers: Shimano Deore
Derailleur: Shimano XT 10-Speed
Shifter: Shimano XT 10-Speed
Cranks: Shimano XT
Chainring: Deckas 38t
Cassette: Shimano HG50 11-36
Saddle: EC90 155mm
All photos by Anna Breit. Words by Christoph Wimmer.

Leave a reply to Jay Cancel reply